
Patch Backings Compared: Iron-On, Velcro, Sew-On & Adhesive
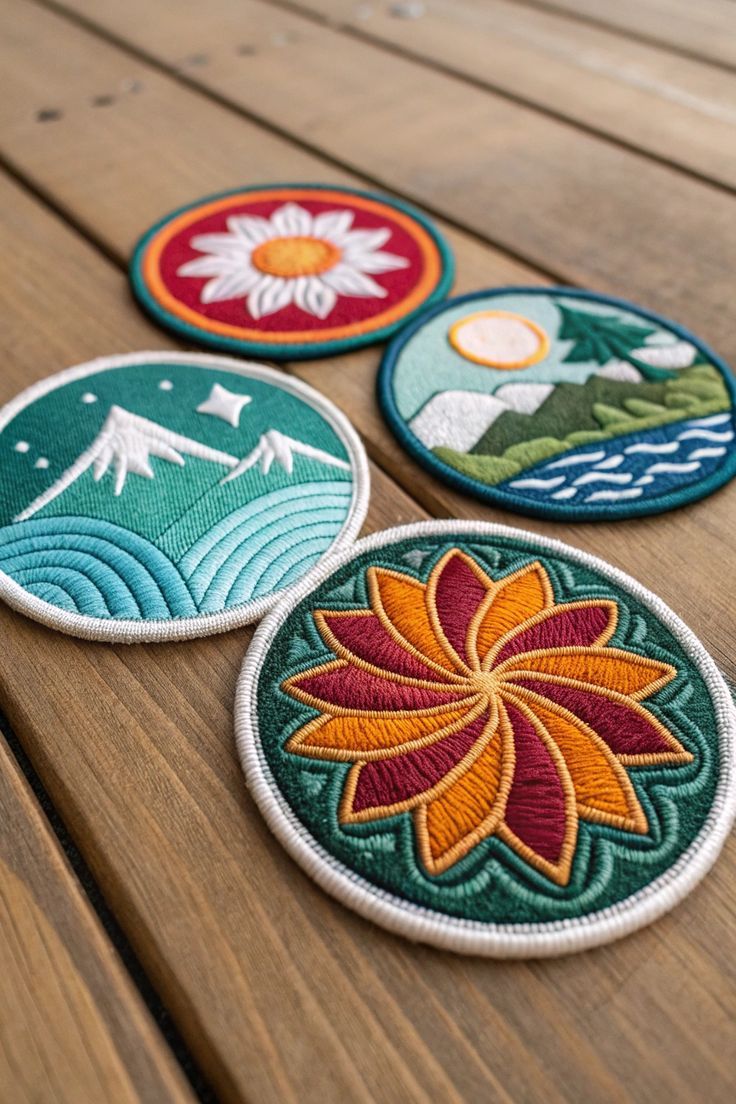
Two identical embroidered patches can live completely different lives: one gets ironed onto a kid’s backpack and survives three school years; the other gets hook-and-loop backing and cycles through a decade of uniform changes. The embroidery is the face of a patch — the backing is its career. This guide compares every common backing so you can order once, correctly.
The Four Main Backings at a Glance
| Backing | Attachment | Permanence | Best for |
|---|---|---|---|
| Iron-on (heat seal) | Household iron / heat press | Semi-permanent | Retail, merch, consumer apparel |
| Sew-on | Stitched by hand or machine | Permanent | Workwear, heavy laundering, leather |
| Hook & loop (Velcro) | Press-on, removable | Removable/swappable | Tactical, medical, staff rotation |
| Adhesive (peel & stick) | Pressure-sensitive | Temporary | Events, promos, sampling |
Iron-On: The Retail Favorite
A heat-activated adhesive film is bonded to the patch back; end users apply it with an iron or heat press in about 20 seconds.
Strengths
- Zero-skill application — ideal for products sold to consumers
- Clean look with no visible stitching around the patch
- Survives normal home laundering when applied correctly
Limits
- Struggles on nylon, waterproof coatings, and heavily textured fabrics
- Industrial laundering and high-heat drying degrade the bond over time
- Not repositionable — a crooked application stays crooked
Pro tip: for retail products, print simple application instructions on your packaging (temperature, pressure, dwell time). It cuts customer complaints dramatically — most “defective patch” returns are 10-second applications that needed 25.
Sew-On: The Permanent Workhorse
No adhesive at all — the patch is stitched to the garment. It’s the oldest method and still the most durable, the default for anything that will be laundered industrially: chef whites, coveralls, security uniforms, motorcycle vests (where leather rules out heat entirely).
A well-made sew-on patch has a merrowed edge (that classic wrapped border) or a laser-cut edge with tight overlock stitching, and lies flat without backing stiffness fighting the garment’s drape. If your patches will be sewn, tell your supplier — the backing can be kept softer than an iron-on’s film layer.
Hook & Loop: Built for Change
Hook tape on the patch, loop panel on the garment. The standard for tactical and military use, and increasingly for hospitals, event staff, and rental workwear — anywhere names, roles, or flags rotate faster than garments.
- Order the pair: a hook-only patch is useless without loop fields on the garments. We supply matched sets.
- Mind the thickness: hook tape adds ~2mm; oversized patches on small loop fields peel at corners.
- Laundering: remove patches before washing garments, or hooks will harvest lint forever.
Adhesive Peel-and-Stick: Short and Sweet
Pressure-sensitive adhesive under a peel-away liner. Perfect for conference badges, one-day activations, and sampling programs. Be honest with expectations: it survives hours to days, not washes. If a client asks for adhesive backing on uniforms, steer them to iron-on or Velcro — you’ll save the relationship.
Edges, Since You’re Deciding Anyway
- Merrowed edge: the classic raised wrap; suits traditional round/shield shapes and adds durability
- Laser-cut edge: follows any custom silhouette exactly — the choice for intricate outlines and modern looks
Backing and edge are independent choices; any combination is possible.
Application Best Practices (the Part Everyone Skips)
Most “patch failures” are application failures. The numbers that matter for iron-on:
- Temperature: 150–160°C (300–320°F) — a household iron on cotton setting, steam OFF
- Pressure: firm body weight through the iron, not a gentle glide
- Dwell: 20–30 seconds on the front, then flip and press 20 more from inside the garment
- Cure: let it cool completely before flexing — the adhesive sets as it cools
- Cover sheet: thin cotton or parchment between iron and patch protects the thread’s sheen
For production volumes, a heat press replaces guesswork with settings: same temperature, 40–60 PSI, and perfectly even pressure that irons can’t match. If you’re supplying patches to customers, printing these five lines on the packaging insert measurably cuts complaints and returns.
Wash-care rules that extend patch life
- Turn garments inside out; wash cold or warm, never hot
- Skip the dryer’s high-heat cycle — it re-melts adhesive over time
- For hook-and-loop systems, remove patches and close the loop fields before washing
Sizing and Shaping: Getting the Patch Itself Right
Backing chosen, one decision remains: the patch’s physical design. Field-tested guidance:
- Hats and caps: 2″–3″ wide fits the front panel; rectangles and shields suit trucker styles
- Chest placement: 3″–3.5″ — patch equivalents of the left chest logo standards
- Shoulders/sleeves: 2.5″–3.5″, with rockers (curved banners) sized to the armhole’s curve
- Jacket backs: 8″–12″ statement pieces — consider appliqué construction at that scale
- Detail floor: lettering under 4mm tall blurs in thread; simplify or enlarge (the same physics as all embroidery digitizing)
Border choice affects perceived style as much as shape: merrowed edges read classic and military; laser-cut edges read modern and fashion-forward. When in doubt, we sample both — seeing the two in hand settles the debate in seconds.
Frequently Asked Questions
Can I iron a patch onto polyester?
Standard polyester, yes, at controlled temperature. Performance polyester with water-repellent coating, no — the adhesive can’t grip. Sew-on is the safe answer for technical fabrics.
What’s the minimum order for custom patches?
We digitize from a single design upward; most clients approve a stitch-tested proof before running a full batch at their own manufacturer. See our custom patch digitizing service for details.
How durable is iron-on through washing?
Correctly applied (full heat, full pressure, full dwell), 25+ home wash cycles is typical. Industrial laundering is a different world — specify sew-on there.
Which backing is cheapest?
Differences are small at volume. Choose by use case, not price — a wrong backing is 100% wasted spend.
Can a patch have no backing at all?
Yes — “no backing” (just the embroidered twill with a finished edge) is standard for patches destined to be sewn into products at a factory, appliquéd onto garments, or collected rather than worn. It gives the softest hand and the most flexible drape. If your patches feed into another manufacturing step rather than an end user’s hands, ask for bare backing and let the next process handle attachment.
Do backings affect how the embroidery itself looks?
Slightly, and in one direction: stiffer backings (iron-on film, firm plastic) hold the patch flatter, which makes fine embroidered detail read crisper — one reason display-quality patches often carry a stiffener even when they’ll be sewn on. Softer backings flex with the garment and feel premium in hand but let very fine detail flex out of perfect flatness. For most designs the difference is invisible; for patches with dense micro-detail, mention the display-versus-wear priority when ordering and we’ll spec accordingly.
What information should my patch order include?
Six lines make an order unambiguous: the artwork (vector preferred, but any clear reference works), finished size, edge type (merrowed or laser-cut), backing choice, quantity, and the deadline. Add a photo or description of the garment it will attach to if you’re unsure about backing — that context is usually all we need to recommend the right build. Orders that arrive with these six answered typically move to sample production the same day; the sample photo comes to you for approval before the run begins, so nothing is committed until you’ve seen the real thing. Reorders are even simpler: reference the original order and any changes, and the archived files do the rest.
Matching Backing to Industry: Quick Scenarios
Sometimes the fastest way to decide is recognizing your situation in someone else’s:
- Restaurant group, 200 aprons and caps: sew-on for the aprons (industrial laundering weekly), iron-on for the caps (spot-cleaned, rarely washed). Split orders like this are routine — don’t force one backing across different garment lives.
- Scout troop or club: iron-on, always. Parents apply them at home; sew-on patches end up in a drawer waiting for a sewing machine that never appears.
- Security company with rotating staff: hook-and-loop name and role patches over sew-on company patches. Uniforms outlast employees; the swappable layer absorbs the turnover.
- Streetwear brand selling patches as products: iron-on with printed application instructions — the customer experience is the product. Consider a hybrid iron-on-plus-stitch recommendation on the insert for longevity buyers.
- Motorcycle club or leather goods: sew-on, no debate. Heat and leather don’t negotiate.
- Trade show season, 500 giveaway patches: adhesive peel-and-stick. They need to survive a lanyard and a weekend, and the unit economics thank you.
The sample-first workflow
Whatever you choose, insist on a physical sample before the production run. A sample answers questions no email thread can: does the backing stiffness suit the garment, does the edge finish match the brand’s feel, does the iron-on actually bond to your specific fabric blend? At Stitch To Art the sample stage is built into every patch order — one approved patch in hand, then the run begins. Revisions at sample stage cost a day; revisions after 500 pieces cost the order.
Conclusion
Match the backing to the patch’s working life: iron-on for consumer ease, sew-on for permanence, hook-and-loop for rotation, adhesive for a weekend. Unsure? Tell us what garment the patch lives on and how it gets washed — we’ll recommend the right build and send a sample before you commit to the run.
The newsletter
Stay Updated With
Industry Insights.
Get the latest embroidery tips, vector design techniques, production advice, and business resources delivered directly to your inbox. One useful email — no spam, ever.
Unsubscribe anytime. We respect your inbox and your data.